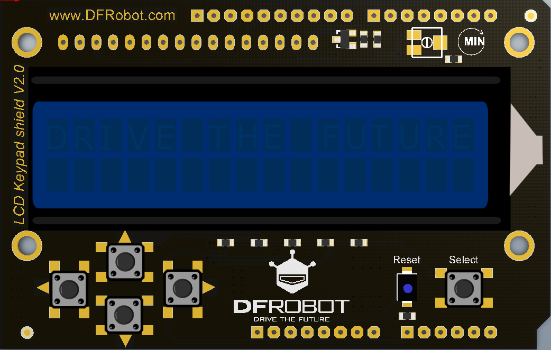
LCD Keypad Shield V2.0

![]()
目录
1 概述
2 产品参数
3 引脚说明
4 使用教程
4.1 准备
4.2 样例代码
5 更多
概述
LCD Keypad Shield 是一款提供2行16字符液晶显示的Arduino扩展板。扩展了多个按键输入,可供用户作为LCD显示屏的菜单选择按键或者操控按键使用。对于Arduino初学者来说,不必为繁琐复杂液晶驱动电路连线而头疼了,这款LCD扩展板将电路简化,直接将此板插到Arduino控制器上即可使用,调用Arduino自带的LCD库,简单的几行代码便可以完成数据和字符的显示功能。
相比于V1.0版本,我们的V2.0版本将LCD镶嵌在PCB底部,只露出液晶屏。使扩展板看起来更加美观;去掉了液晶对比度调节的电位器,因为我们发现,这个调节对比度的功能不太常用,一般第一次设置好后就不需要再调节了,所以我们在设计的时候已经确定了比较合适的对比度,不需要用户自己去调整。同时去掉了V1.0版本中引出的所有扩展I/O口,使扩展板更加专注的实现自己的显示功能,并使用更高的按键,便于用户将LCD Keypad Shield所搭建的Arduino数据监控平台或者小型操控平台封装在模具内。
![]()
IOREF引脚:
由于在V2版的设计中,添加了IOREF引脚,该引脚连接在5V口。因此,当DFR0374插在底层主控板上后,如果您的主控板的工作电压不是5V,如3.3V,建议您将DRI0009上的IOREF引脚用剪刀剪断,或者用用硬物划断PCB板上它们之间的接线,否则可能引起工作不正常或主控板烧坏等意外状况。如果主控板操作电压是5V,您可以放心使用。对此,我们深表歉意,我们将会在下一版本中修改此设计。如果给您带来不便,敬请谅解!
产品参数
工作电压:5V
1602蓝色背景液晶(2行16字节)
5个按键输入
尺寸:54*84mm
引脚说明
![]()
引脚
描述
模拟脚0
按钮 (选择, 上, 右, 下,左)
数字脚4
DB4
数字脚5
DB5
数字脚6
DB6
数字脚7
DB7
数字脚8
RS (数据或信号显示选择)
数字脚9
使能(开始数据的读/ 写)
数字脚10
背光控制
使用教程
下面我们以一个简单的样例,来教大家如何使用我们的LCD 按键扩展版。
准备
首先准备好下面的硬件及安装好软件
硬件
DF_UNO x1
LCD Keypad Shield V2.0 扩展板 x1
软件
Arduino IDE V1.6.5 点击下载Arduino IDE
样例代码
硬件连接部分弄完了以后,我们就来看看软件部分怎么弄吧。
首先你需要下载下面链接的库文件及一些参考资料。将这个文件夹解压后复制出来放到我们ARDUINO安装目录下的libraries文件夹中就可以了。
点击下载LCD Keypad Shield V2.0 library。
具体的安装库文件方法可以参考下面的链接
如何安装库?
接下来我们就需要打开ARDUINO IDE了,将我们的下面的代码复制到IDE中,注意:将刚刚打开的IDE中的所有内容都删除掉!然后选好串口和板型(UNO),点击下载就OK了。
/***************************************************
LCD Keypad Shield
<http://www.dfrobot.com.cn/goods-1189.html>
This example Test LCD liquid crystal display and 5 buttons properly.
Created 2015-7-30
By Loan <Loan.he@dfrobot.com>
GNU Lesser General Public License.
See <http://www.gnu.org/licenses/> for details.
All above must be included in any redistribution
****************************************************/
/***********Notice and Trouble shooting***************
1.Connection and Diagram can be found here
<http://wiki.dfrobot.com.cn/index.php?title=%28SKU:DFR0374%29LCD_Keypad_Shield_V2.0>
2.This code is tested on Arduino Uno, Leonardo, Mega boards.
3.LCD library is created by jonoxer.
See <http://www.dfrobot.com.cn/images/upload/File/DFR0374/20151103105417pp7en5.zip Arduino LiquidCrystal library]> for details.
****************************************************/
#include <LiquidCrystal.h>
//Definitions used on the LCD to pin
LiquidCrystal lcd(8, 9, 4, 5, 6, 7);
// Define keys
int lcd_key = 0;
int adc_key_in = 0;
#define btnRIGHT 0
#define btnUP 1
#define btnDOWN 2
#define btnLEFT 3
#define btnSELECT 4
#define btnNONE 5
//Read the key value
int read_LCD_buttons()
{
adc_key_in = analogRead(0); // 0 read the ADC from analog values
// By setting different threshold, you can read the corresponding to the appropriate buttons
if (adc_key_in > 1000) return btnNONE;
if (adc_key_in < 50) return btnRIGHT;
if (adc_key_in < 250) return btnUP;
if (adc_key_in < 450) return btnDOWN;
if (adc_key_in < 650) return btnLEFT;
if (adc_key_in < 850) return btnSELECT;
return btnNONE;
}
void setup()
{
lcd.begin(16, 2); // Start
lcd.setCursor(0,0);
lcd.print("Push the buttons"); //print“Push the buttons”
}
void loop()
{
lcd.setCursor(9,1);
lcd.print(millis()/1000); // Output wait
lcd.setCursor(0,1); //
lcd_key = read_LCD_buttons(); // Reading keys
switch (lcd_key) // Judge key
{
case btnRIGHT:
{
lcd.print("RIGHT ");
break;
}
case btnLEFT:
{
lcd.print("LEFT ");
break;
}
case btnUP:
{
lcd.print("UP ");
break;
}
case btnDOWN:
{
lcd.print("DOWN ");
break;
}
case btnSELECT:
{
lcd.print("SELECT");
break;
}
case btnNONE:
{
lcd.print("NONE ");
break;
}
}
}
更多
资源链接
Arduino LiquidCrystal library
LCD Keypad Shield V2.0 原理图
LCD Keypad Shield V2.0 管脚布局
更多问题及有趣的应用,可以 访问论坛 进行查阅或发帖!
![]()