我的自平衡小车之第一步——读取九轴姿态传感器并显示到OLED
首先感谢弘毅老大的详细教程和thomas的库文件!
虽然只是开了个微不足道的头,但是总算有个比较完整的输入输出的东西,也算是进了Arduino的门槛。
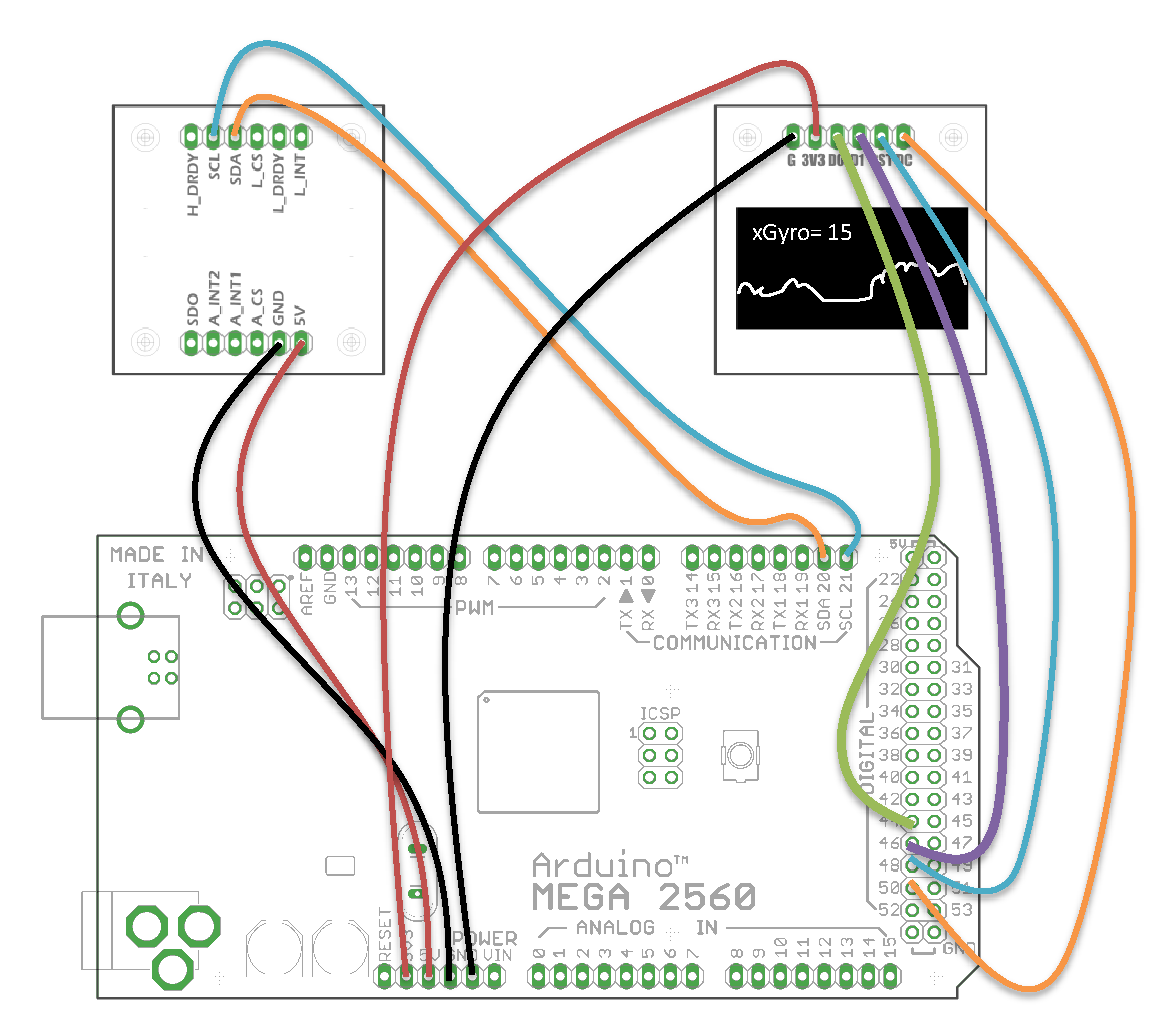
闲话不多说了,先上联线图:

2012-3-21 14:00 上传(170.9 KB)
传感器是一位单片机前辈贴的板子,集成ADXL345+L3G4200D+HMC5883L三个芯片,考虑到以后无论做自平衡车还是做四轴,肯定要逐步升级算法,所以索性先把传感器的部分能弄的先都解决了再说。OLED是一款6pin接口的12864,暂时主要作为运行状态监控。
下面是代码:#include <Wire.h> // IIC运行库
#include <SSD1306.h> // OLED运行库
#define OLED_CS 42 // CS脚
#define OLED_CLK 44 // CLK脚
#define OLED_MOSI 46 // MISO脚
#define OLED_RESET 48 // RST脚
#define OLED_DC 50 // D/C脚
SSD1306 oled(OLED_MOSI, OLED_CLK, OLED_DC, OLED_RESET, OLED_CS);
// 定义OLED
#define Acc 0x1D; // ADXL345的I2C地址
#define Gyr 0x69; // L3G4200D的I2C地址
#define Mag 0x1E; // HMC5883L的I2C地址
char str[16]; // 输出字符串(切勿溢出)
int curve[128]; // 曲线数据
int i = 0;
void setup() {
oled.ssd1306_init(SSD1306_SWITCHCAPVCC);
oled.clear(); // 清空oled屏
oled.drawstring(0, 0, "Setting up...");
oled.display(); // 显示到oled
// 初始化OLED
sensor_init(); // 初始化传感器
delay(2000);
}
void loop() {
int x;
curve[i] = gDat(Gyr, 0); // 读取传感器,根据需要读取不同传感器数据
if (curve[i] < -26) curve[i] = -26; // 上溢出
if (curve[i] > 26) curve[i] = 26; // 下溢出
oled.clear(); // 清空oled屏
sprintf(str, "xGyro= %d", curve[i]);// 输出字符串
oled.drawstring(0, 0, str); // 输出到到oled
for (x = 0; x < 127; x++) {
oled.drawline(x, 37 - curve[x], x+1, 37 - curve[x+1], WHITE);
} // 绘制曲线
oled.display(); // 显示到oled
i++;
if (i == 128) i = 0;
delay(10);
}
int gDat(int device, int axis) {
// 读九轴姿态传感器寄存器函数
// For Arduino, by 黑马
// 调用参数表
// type device axis
// 0 1 2
// ADXL345 Acc x y z
// L3G4200D Gyr x y z
// HMC5883L Mag x z y
// Example
// 00 #include <Wire.h>
// 01 #define Acc 0x1D;
// 02 #define Gyr 0x69;
// 03 #define Mag 0x1E;
// 04
// 05void setup() {
// 06 sensor_init();
// 07 delay(1000);
// 08}
// 09
// 10void loop() {
// 11 Z-Gyroscope = gDat(Gyr, 2);
// 12 delay(50);
// 13}
int v;
byte vL, vH, address; // 存放byte数值
if (device == Acc) address = 0x32;// ADXL345的读数地址
if (device == Gyr) address = 0xA8;// L3G4200D的读数地址
if (device == Mag) address = 0x03;// HMC5883L的读数地址
address = address + axis * 2; // 数据偏移-坐标轴
Wire.beginTransmission(device); // 开始传输数据
Wire.send(address); // 发送指针
Wire.requestFrom(device, 2); // 请求2 byte数据
while(Wire.available() < 2); // 成功获取前等待
vL = Wire.receive();
vH = Wire.receive(); // 读取数据
Wire.endTransmission(); // 结束传输
if (device == Mag) v = (vL << 8) | vH;
else v = (vH << 8) | vL; // 将byte数据合并为Int
return v; // 返回读书值
}
void sensor_init() { // 配置九轴姿态传感器
writeRegister(Acc, 0x2D, 0b00001000); // 测量模式
// 配置ADXL345
writeRegister(Gyr, 0x20, 0b00001111); // 设置睡眠模式、x, y, z轴使能
writeRegister(Gyr, 0x21, 0b00000000); // 选择高通滤波模式和高通截止频率
writeRegister(Gyr, 0x22, 0b00000000); // 设置中断模式
writeRegister(Gyr, 0x23, 0b00110000); // 设置量程(2000dps)、自检状态、SPI模式
writeRegister(Gyr, 0x24, 0b00000000); // FIFO & 高通滤波
// 配置L3G4200D(2000 deg/sec)
writeRegister(Mag, 0x02, 0x00); // 连续测量
// 配置HMC5883L
}
void writeRegister(int device, byte address, byte val) { // 写寄存器
Wire.beginTransmission(device);
Wire.send(address);
Wire.send(val);
Wire.endTransmission();
}复制代码传感器部分的读取写成了一个函数,效率应该还是挺高的,我想调用和移植都比较方便。传感器属于以后会用到比较多的东西,所以我想一次做得稍微完善一些。
<SSD1306.h>是thomas帖子里的,看了.h和.cpp,和网上另一个Adafruit_SSD1306差不多,正在研究两者的区别。
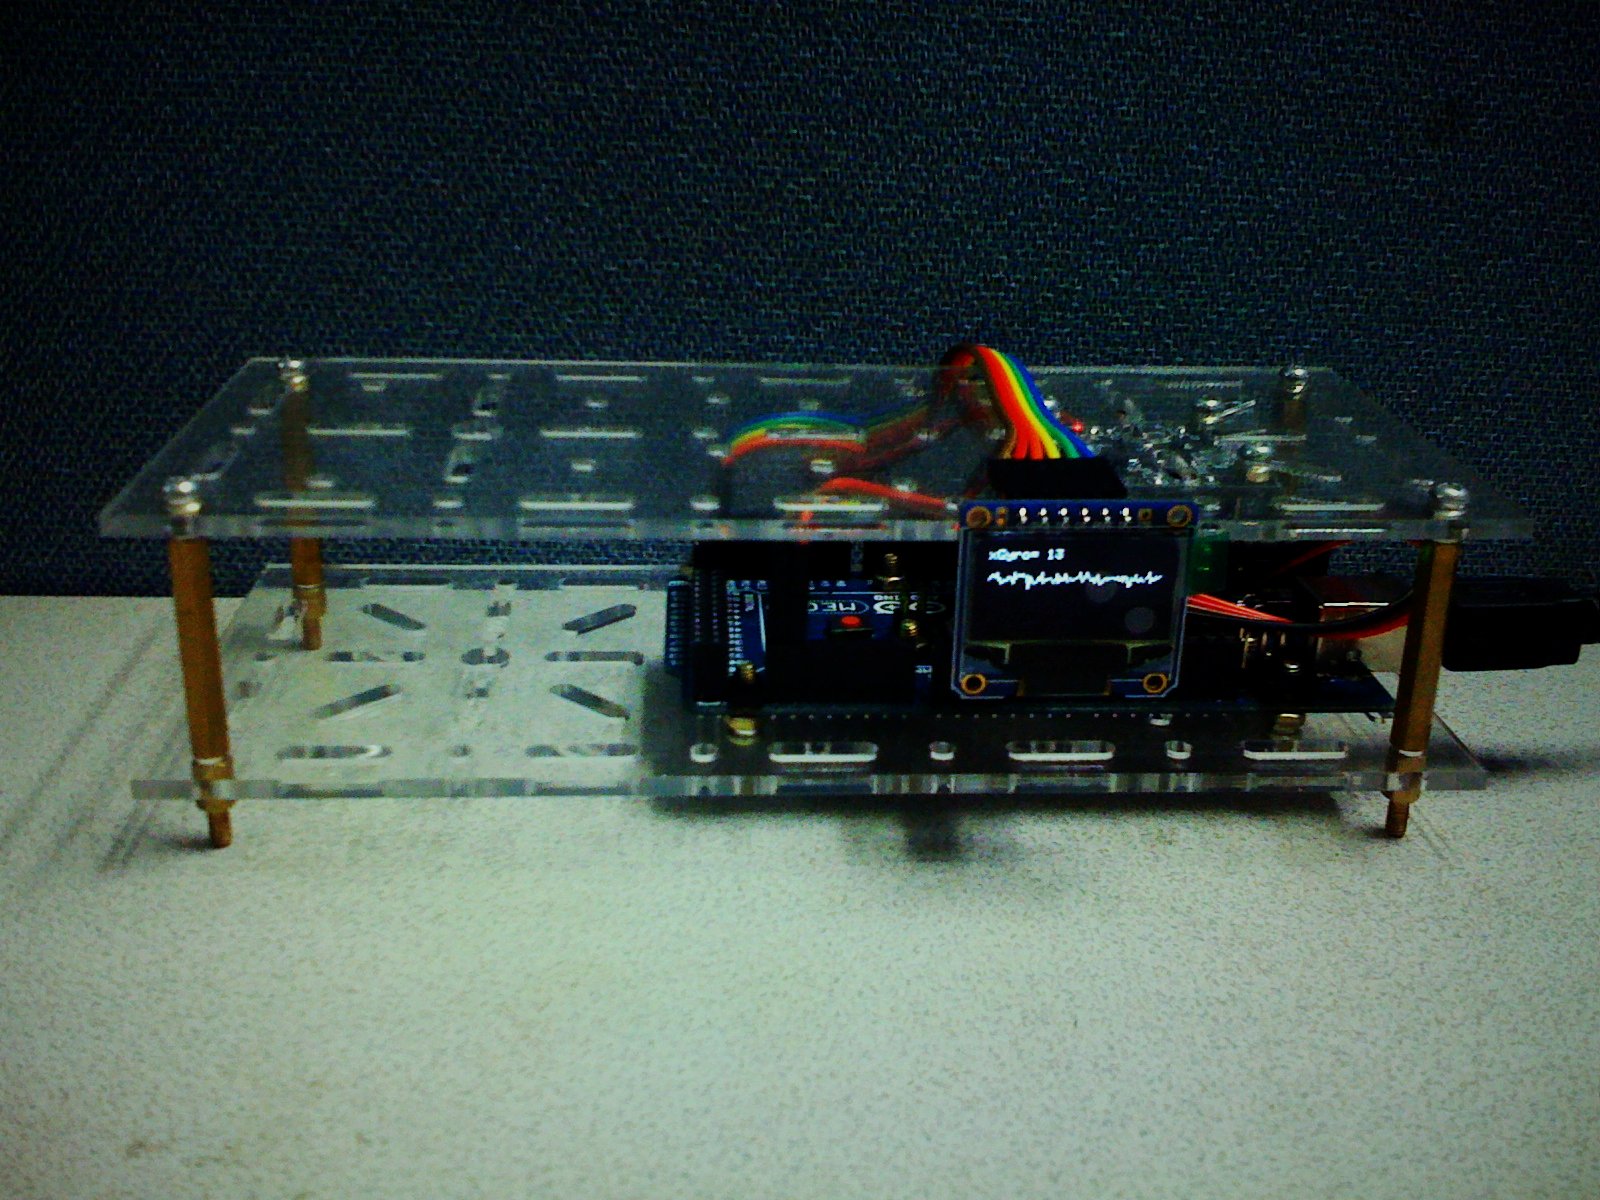
显示效果无非是实时数值和曲线,比较简单,就不放视频了,放个图片吧。

2012-3-21 14:07 上传(356.5 KB)
via - 极客工坊