Arduino内置教程-通讯-ASCIITable
ASCII Table
这个例子示范了领先的串口打印函数,在串口监视器产生字符表格和它们在decimal,hexadecimal, octal, 和 binary的ASCII值。更多关于ASCII,请参考asciitable.com
硬件要求
- Arduino or Genuino 开发板
电路

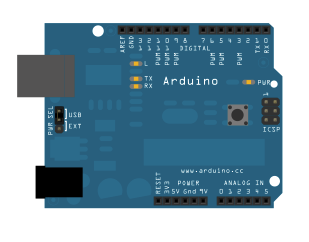
无其他要求,只要开发板通过串口或者USB口连接到电脑。
样例代码
这个程序等待setup()函数的串口连接,然后一行一行打印ASCII表格直至最后一个字符。当完成这个步骤,如果没有其他事,它会进入无止尽的循环。关闭和打开串口监视窗口将会使开发板复位,从而使程序重新开始运行。
/*
  ASCII table

 Prints out byte values in all possible formats:
 * as raw binary values
 * as ASCII-encoded decimal, hex, octal, and binary values

 For more on ASCII, see http://www.asciitable.com and http://en.wikipedia.org/wiki/ASCII

 The circuit:  No external hardware needed.

 created 2006
 by Nicholas Zambetti
 modified 9 Apr 2012
 by Tom Igoe

 This example code is in the public domain.

 <http://www.zambetti.com>

 */
void setup() {
  //Initialize serial and wait for port to open:
  Serial.begin(9600);
  while (!Serial) {
    ; // wait for serial port to connect. Needed for native USB port only
  }

  // prints title with ending line break
  Serial.println("ASCII Table ~ Character Map");
}

// first visible ASCIIcharacter '!' is number 33:
int thisByte = 33;
// you can also write ASCII characters in single quotes.
// for example. '!' is the same as 33, so you could also use this:
//int thisByte = '!';

void loop() {
  // prints value unaltered, i.e. the raw binary version of the
  // byte. The serial monitor interprets all bytes as
  // ASCII, so 33, the first number,  will show up as '!'
  Serial.write(thisByte);

  Serial.print(", dec: ");
  // prints value as string as an ASCII-encoded decimal (base 10).
  // Decimal is the  default format for Serial.print() and Serial.println(),
  // so no modifier is needed:
  Serial.print(thisByte);
  // But you can declare the modifier for decimal if you want to.
  //this also works if you uncomment it:

  // Serial.print(thisByte, DEC);


  Serial.print(", hex: ");
  // prints value as string in hexadecimal (base 16):
  Serial.print(thisByte, HEX);

  Serial.print(", oct: ");
  // prints value as string in octal (base 8);
  Serial.print(thisByte, OCT);

  Serial.print(", bin: ");
  // prints value as string in binary (base 2)
  // also prints ending line break:
  Serial.println(thisByte, BIN);

  // if printed last visible character '~' or 126, stop:
  if (thisByte == 126) {    // you could also use if (thisByte == '~') {
    // This loop loops forever and does nothing
    while (true) {
      continue;
    }
  }
  // go on to the next character
  thisByte++;
}
[Get Code]
输出
ASCII Table ~ Character Map
!, dec: 33, hex: 21, oct: 41, bin: 100001
", dec: 34, hex: 22, oct: 42, bin: 100010
#, dec: 35, hex: 23, oct: 43, bin: 100011
$, dec: 36, hex: 24, oct: 44, bin: 100100
%, dec: 37, hex: 25, oct: 45, bin: 100101
&, dec: 38, hex: 26, oct: 46, bin: 100110
', dec: 39, hex: 27, oct: 47, bin: 100111
(, dec: 40, hex: 28, oct: 50, bin: 101000
), dec: 41, hex: 29, oct: 51, bin: 101001
*, dec: 42, hex: 2A, oct: 52, bin: 101010
+, dec: 43, hex: 2B, oct: 53, bin: 101011
,, dec: 44, hex: 2C, oct: 54, bin: 101100
-, dec: 45, hex: 2D, oct: 55, bin: 101101
., dec: 46, hex: 2E, oct: 56, bin: 101110
/, dec: 47, hex: 2F, oct: 57, bin: 101111
0, dec: 48, hex: 30, oct: 60, bin: 110000
1, dec: 49, hex: 31, oct: 61, bin: 110001
2, dec: 50, hex: 32, oct: 62, bin: 110010
3, dec: 51, hex: 33, oct: 63, bin: 110011
4, dec: 52, hex: 34, oct: 64, bin: 110100
5, dec: 53, hex: 35, oct: 65, bin: 110101
6, dec: 54, hex: 36, oct: 66, bin: 110110
7, dec: 55, hex: 37, oct: 67, bin: 110111
8, dec: 56, hex: 38, oct: 70, bin: 111000
9, dec: 57, hex: 39, oct: 71, bin: 111001
:, dec: 58, hex: 3A, oct: 72, bin: 111010
;, dec: 59, hex: 3B, oct: 73, bin: 111011
<, dec: 60, hex: 3C, oct: 74, bin: 111100
=, dec: 61, hex: 3D, oct: 75, bin: 111101
>, dec: 62, hex: 3E, oct: 76, bin: 111110
?, dec: 63, hex: 3F, oct: 77, bin: 111111
@, dec: 64, hex: 40, oct: 100, bin: 1000000
A, dec: 65, hex: 41, oct: 101, bin: 1000001
B, dec: 66, hex: 42, oct: 102, bin: 1000010
C, dec: 67, hex: 43, oct: 103, bin: 1000011
D, dec: 68, hex: 44, oct: 104, bin: 1000100
E, dec: 69, hex: 45, oct: 105, bin: 1000101
...
更多
- increment, ++
- while()
- serial()
- Dimmer - 移动鼠标来改变LED灯的亮度
- Graph - 发送数据到电脑,然后在Processing里画出它的图表。
- Midi - 连续发送MIDI音符信息
- MultiSerialMega - 使能Arduino Mega上2个串口。
- PhysicalPixel - 通过从Processing或者Max/MSP发送数据到Arduino上,使LED开关。
- ReadASCIIString - 分析整数里一个用逗号分隔的字符串,来使一个LED灯褪色。
- SerialCallResponse - 通过一个呼-应的方法(握手)来发送多个变数
- SerialCallResponseASCII - 通过一个呼-应的方法(握手)来发送多个变数,并在发送前解码(ASCII)这些数值。
- SerialEvent - 使用SerialEvent()函数
- VirtualColorMixer - 从Arduino发送多个变数到你的电脑,然后在Processing或者Max/MSP上读取这些数据