Arduino/Genuino 101 入门教程二:获取加速度计和陀螺仪数据
加速度计和陀螺仪是101一大特色,当然得玩玩啦,就是冲这个来的嘛。本来我还在纠结怎么获取传感器的数据?怎么对数据进行滤波?怎么对数据进行融合?但是,这些现在都变的简单了,有现成的库文件CurieIMU和MadgwickAHRS可以用来获取和处理传感器得到的数据。
咳咳,玩起来:
1.下载程序:
在库文件中能找到六轴姿态传感器驱动库libraries\CurieIMU,里面有测试程序Accelerometer,这个程序一开始没有对数据进行校正,可以手动天加一下校正代码就好了,下面是添加好校正代码的程序:
/* Copyright (c) 2015 Intel Corporation.All rights reserved. This library is free software; you can redistribute it and/or modify it under the terms of the GNU Lesser General Public License as published by the Free Software Foundation; either version 2.1 of the License, or (at your option) any later version. This library is distributed in the hope that it will be useful, but WITHOUT ANY WARRANTY; without even the implied warranty of MERCHANTABILITY or FITNESS FOR A PARTICULAR PURPOSE.See the GNU Lesser General Public License for more details. You should have received a copy of the GNU Lesser General Public License along with this library; if not, write to the Free Software Foundation, Inc., 51 Franklin Street, Fifth Floor, Boston, MA02110-1301USA// This sketch example demonstrates how the BMI160 on the Intel(R) Curie(TM) module can be used to read accelerometer data*/#include <CurieIMU.h>int calibrateOffsets = 1; // int to determine whether calibration takes place or notvoid setup() {Serial.begin(9600); // initialize Serial communicationwhile (!Serial); // wait for the serial port to open// initialize deviceSerial.println("Initializing IMU device...");CurieIMU.begin();if (calibrateOffsets == 1) { // use the code below to calibrate accel/gyro offset values Serial.println("Internal sensor offsets BEFORE calibration..."); Serial.print(CurieIMU.getAccelerometerOffset(X_AXIS)); Serial.print("\t"); Serial.print(CurieIMU.getAccelerometerOffset(Y_AXIS)); Serial.print("\t"); Serial.print(CurieIMU.getAccelerometerOffset(Z_AXIS)); Serial.print("\t"); Serial.println(""); Serial.print("Starting Acceleration calibration..."); CurieIMU.autoCalibrateAccelerometerOffset(X_AXIS, 0); CurieIMU.autoCalibrateAccelerometerOffset(Y_AXIS, 0); CurieIMU.autoCalibrateAccelerometerOffset(Z_AXIS, 1); Serial.println(" Done"); Serial.println("Internal sensor offsets AFTER calibration..."); Serial.print(CurieIMU.getAccelerometerOffset(X_AXIS)); Serial.print("\t"); Serial.print(CurieIMU.getAccelerometerOffset(Y_AXIS)); Serial.print("\t"); Serial.print(CurieIMU.getAccelerometerOffset(Z_AXIS)); Serial.print("\t"); Serial.println("");}// Set the accelerometer range to 2GCurieIMU.setAccelerometerRange(2);}void loop() {int axRaw, ayRaw, azRaw; // raw accelerometer valuesfloat ax, ay, az;// read raw accelerometer measurements from deviceCurieIMU.readAccelerometer(axRaw, ayRaw, azRaw);// convert the raw accelerometer data to G'sax = convertRawAcceleration(axRaw);ay = convertRawAcceleration(ayRaw);az = convertRawAcceleration(azRaw);// display tab-separated accelerometer x/y/z valuesSerial.print("a:\t");Serial.print(ax);Serial.print("\t");Serial.print(ay);Serial.print("\t");Serial.print(az);Serial.println();// wait 5 secondsdelay(500);}float convertRawAcceleration(int aRaw) {// since we are using 2G range// -2g maps to a raw value of -32768// +2g maps to a raw value of 32767float a = (aRaw * 2.0) / 32768.0;return a;}复制代码串口读出来的数据,很准确,可以转动板子看看每个轴的数据变化:
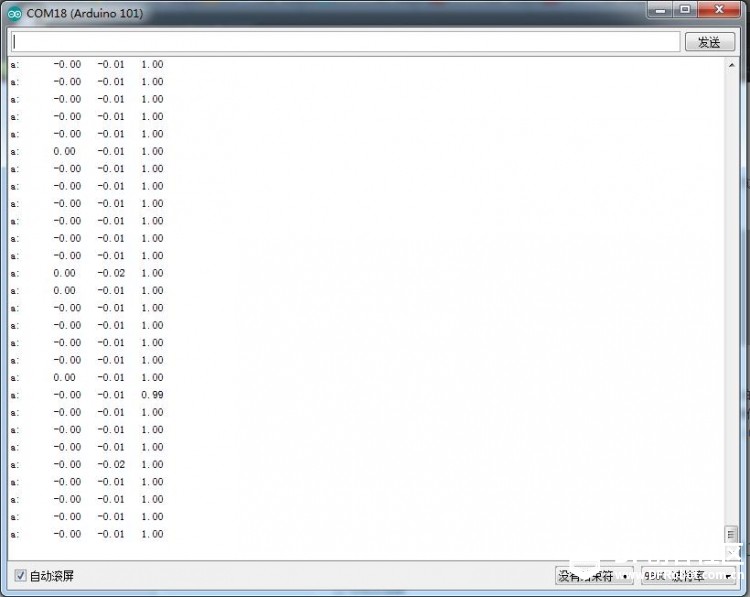
1.jpg (58.48 KB, 下载次数: 0)
下载附件
保存到相册
2016-3-20 09:39 上传
2.读取陀螺仪的数据:下载程序,在库文件中能找到六轴姿态传感器驱动库libraries\CurieIMU,里面有测试程序Gyro,同样加几句代码事先校正一下数据,下面是添加好校正代码的程序:
/* Copyright (c) 2015 Intel Corporation.All rights reserved. This library is free software; you can redistribute it and/or modify it under the terms of the GNU Lesser General Public License as published by the Free Software Foundation; either version 2.1 of the License, or (at your option) any later version. This library is distributed in the hope that it will be useful, but WITHOUT ANY WARRANTY; without even the implied warranty of MERCHANTABILITY or FITNESS FOR A PARTICULAR PURPOSE.See the GNU Lesser General Public License for more details. You should have received a copy of the GNU Lesser General Public License along with this library; if not, write to the Free Software Foundation, Inc., 51 Franklin Street, Fifth Floor, Boston, MA02110-1301USA// This sketch example demonstrates how the BMI160 on the Intel(R) Curie(TM) module can be used to read gyroscope data*/#include "CurieIMU.h"void setup() {Serial.begin(9600); // initialize Serial communicationwhile (!Serial); // wait for the serial port to open// initialize deviceSerial.println("Initializing IMU device...");CurieIMU.begin();Serial.print("Starting Gyroscope calibration...");CurieIMU.autoCalibrateGyroOffset();Serial.println(" Done");// Set the accelerometer range to 250 degrees/secondCurieIMU.setGyroRange(250);}void loop() {int gxRaw, gyRaw, gzRaw; // raw gyro valuesfloat gx, gy, gz;// read raw gyro measurements from deviceCurieIMU.readGyro(gxRaw, gyRaw, gzRaw);// convert the raw gyro data to degrees/secondgx = convertRawGyro(gxRaw);gy = convertRawGyro(gyRaw);gz = convertRawGyro(gzRaw);// display tab-separated gyro x/y/z valuesSerial.print("g:\t");Serial.print(gx);Serial.print("\t");Serial.print(gy);Serial.print("\t");Serial.print(gz);Serial.println();// wait 5 secondsdelay(1000);}float convertRawGyro(int gRaw) {// since we are using 250 degrees/seconds range// -250 maps to a raw value of -32768// +250 maps to a raw value of 32767float g = (gRaw * 250.0) / 32768.0;return g;}复制代码串口数据输出,这里我让开发板绕X轴旋转得到的数据,考虑手动操作的误差,y轴和z轴基本保持不变,数据看起来不错哦:

2.jpg (60.98 KB, 下载次数: 0)
下载附件
保存到相册
2016-3-20 09:38 上传
拓展:
既然加速度计和陀螺仪的数据读出来了,那么是不是该用这个数据来干点什么,嘿嘿嘿,是不是可以干坏事了啊!下个教程教你怎么干坏事,不要太激动哦
。
看累了没,开心一刻:
刚才和朋友聊天,其中有谈到你,知道吗?我和他们吵了起来,还差点动手打起来,因为他们有的说你像猴子,有的说你像猩猩,实在太过分了!根本没有把你当猪看!
【Arduino/Genuino 101 入门教程】
Arduino 101 入门教程一:环境配置Arduino 101 入门教程二:获取加速度计和陀螺仪数据Arduino 101 入门教程三:姿态角Arduino 101 入门教程四:processing玩转六轴数据Arduino 101 入门教程五:蓝牙发送数据Arduino 101 入门教程六:蓝牙接收数据
- DF创客社区版权所有,欢迎转载。转载请务必标注来源: DF创客社区+作者姓名+原文网址。