教你如何完美使用Ethernet模块
本帖最后由 何处不江南 于 2013-11-21 13:50 编辑
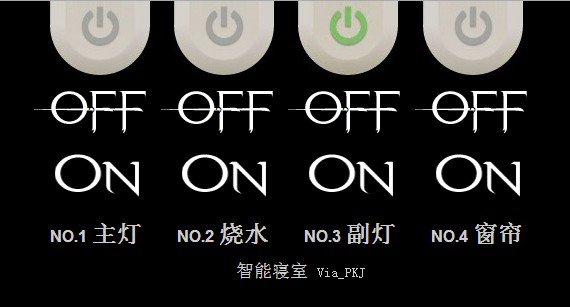
今天在QQ空间找到了arduino炫项目,是通过web来控制电器,地址为:http://user.qzone.qq.com/1485592 ... &pos=1366299761,分享给大家,以下是正文,颤抖吧:大致步骤:
访问服务器端WEB主页面》》》
主页面向Arduino发送POST请求数据》》》
Arduino接收并解码主页的请求,同时将变更的值进行合成出子页面,传给主页面的iframe》》》
主页面延时一定时间,等待Arduino反馈的页面并进行局部iframe刷新>OK!
恩,我自己看都觉得复杂,不过响应速度相当好!(平均20ms内)
老子好像变成程序员了 = =!

psb.jpg (33.82 KB, 下载次数: 0)
下载附件
保存到相册
2013-11-21 11:44 上传
WEB端程序:
<!doctype html><html lang="en"><head><meta charset="utf-8" /><meta name="viewport" content="width=200px"/><title>Light-Microduino</title><link rel="stylesheet" href="jquery-ui.css" /><style>.STYLE4 { color:#CCCCCC; margin: 0 auto; bottom: 10%; left:42%;}.STYLE6 { font-size: medium; color: #CCCCCC; font-family: Arial, Helvetica, sans-serif;}.STYLE8 { font-size: x-large; color: #CCCCCC; font-family: Arial, Helvetica, sans-serif;}.STYLE9 {font-size: large}.STYLE10 {font-size: small}</style><script oldoldsrc="jquery-1.9.1.js"></script><script oldoldsrc="jquery-ui.js"></script><script>function show(){ $("#s1").attr("src", "http://192.168.1.122"); document.getElementById("#s1").contentDocument.location.reload(true); } $(document).ready(function (){ $("#button10").click(function(){ status1=10; $.post("http://192.168.1.122",{"lightstatus":status1}); t = setTimeout("show()",60); }); $("#button11").click(function(){ status1=11; $.post("http://192.168.1.122",{"lightstatus":status1}); t = setTimeout("show()",60); }); $("#button20").click(function(){ status2=20; $.post("http://192.168.1.122",{"lightstatus":status2}); t = setTimeout("show()",60); }); $("#button21").click(function(){ status2=21; $.post("http://192.168.1.122",{"lightstatus":status2}); t = setTimeout("show()",60); }); $("#button30").click(function(){ status3=30; $.post("http://192.168.1.122",{"lightstatus":status3}); t = setTimeout("show()",60); }); $("#button31").click(function(){ status3=31; $.post("http://192.168.1.122",{"lightstatus":status3}); t = setTimeout("show()",60); }); $("#button40").click(function(){ status4=40; $.post("http://192.168.1.122",{"lightstatus":status4}); t = setTimeout("show()",60); }); $("#button41").click(function(){ status4=41; $.post("http://192.168.1.122",{"lightstatus":status4}); t = setTimeout("show()",60); }); clearTimeout(t); });</script></head><div id="zoom"><body style="background-color:black";><div style="width:540px; height:920px; top:44%; margin:0 auto; padding-left:1%; padding-right:1%; "><div style="margin:0 auto; margin-left: 7px; margin-top:-46px;"> <iframe id="s1" name="s1" oldoldsrc="http://192.168.1.122" frameborder="
Arduino端程序:
#include <EtherCard.h>#define NUM 4#define PIN1 A0#define PIN2 A1#define PIN3 A2#define PIN4 A3int RELAY_PIN[NUM];uint8_t lightStatus[NUM];int light;static byte mymac[] = { 0x74,0x69,0x69,0x2D,0x30,0x31 };static byte myip[] = { 192,168,1,122 };static byte gwip[] = { 192,168,1,1};byte Ethernet::buffer[900];void setup () {Serial.begin(9600);Serial.println("Light Microduino");if(!ether.begin(sizeof Ethernet::buffer, mymac,10)) Serial.println( "Failed to access Ethernet controller");else Serial.println("Ethernet controller initialized");if(ether.staticSetup(myip, gwip)){ Serial.println("Set static IP ok!");}else{ Serial.println("Set static IP Failed!");}RELAY_PIN[